The other day I was staring at my bedroom walls thinking that there was something seriously missing. It's such a large space that most of the walls are currently void of artwork, and I had no clue where to start. The only thing I knew was that whatever it was, I had to make it myself. It's the curse of the DIYers.
One weekend, I was browsing through Pinterest and came across an art piece of Texas
What you will need:
 |
| Square |
 |
Crochet Thread - They come in multiple colors and sizes (WalMart or any craft store - $1-$5) |
 |
| Jute Twine (Hobby Lobby or any craft store - $2-$5) |
 |
| Hot Glue Gun (WalMart or any craft store - $2-$5) |
Step 1
Start by tacking out your shape. I chose to do mine freehand, but normally I would recommend drawing a mirrored image of the state on the reverse side. It makes the tacking easier, and once you've put a thumbtack into cork board, it shouldn't be moved or adjusted. If you pull it out and re-tack, a larger hole will be created, and the thumbtacks will not stay in.
Helpful hint:
You might want to place another cork board underneath the one that you're tacking. If you found another brand or type of board that's thicker, GOOD! You're lucky. Cork board tiles are typically thinner, so the pins will go all the way through the other side. Placing another cork board underneath prevents little pokes and prods as you tack.
Step 2
After the border is finished, tack the heart around your favorite part of the state. In my case it was Salt Lake City
Step 3
Time to thread. The easiest place to start is the upper point of the heart. Loop the end of your crochet thread around a thumbtack, leaving a small tail to wrap in order for the thread to hold. From there, work your way around the border, wrapping thread only once on the 'border' tacks, and connect them to the nearest 'heart' tacks.
Step 4
I chose to outline both the state and the heart to create a bolder definition, but it is not necessary to do so as it looks good with or without. Once the entire piece has been thread, cut the string, again leaving a small tail to wrap around the thumbtack to hold the thread in place.
Here's where this project appears daunting.
The back side, as I said, will have the tips of the tacks sticking out. I thought of all of the random craft supplies I had at my house, and chose one of the most time consuming options. Time consuming, but worth it!
As I've made a lot of these cork boards by now, I'm in the process of figuring out quicker and easier ways to cover the back. If I come up with something genius, I'll be sure to post it.
If you are a lazy bum (like I usually am) and decide that this step is unnecessary, feel free to skip to Step 6. The reason I would recommend Step 5 is because the tacks might scratch up your walls...and also because the back turns out AWEsome. "Radical", if you will.
Step 5
Warm up the hot glue gun, unravel a couple feet of twine, and flip the cork board upside down.
To start, hot glue a line about 3 inches long starting at the top corner. Line your twine up with the glue and press down, pressing on the ends first and working your way to the middle. The quicker you lay down the twine, the better it sticks (don't say "duh" you turd, someone may not know this!)
Continue this process working your way in towards the center. Once you've survived up to the last small sight of cork board (if you did, CONGRATULATIONS!!!), cut the twine with enough to cover that small spot - place a glob of glue on that empty space and push that twine into it. It may slightly burn, but it's a good burn. The burn of a job well done.
Step 6
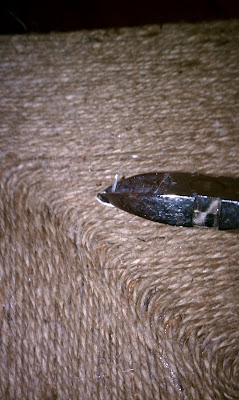
If you would like to hang your nearly finished art piece, take two thumbtacks and cut the points off with diagonal pliers. Then cut a piece of twine about 2 ½ inches long. Organize the twine and thumbtacks to where you would like them. One by one, place a glob of hot glue onto the bottom of the tacks - press onto the edge of the twine you cut and hold for 30+ seconds.
Step 7
The FUN part!!
If you would like to add color (which, come on...why wouldn't you??), it's very, very simple.
Paint the thumb tacks just like you would your nails. Hopefully you have a steady hand - if not, wipe the slip-up before it dries, or use nail polish remover.
Now, don't be confused...like I said, I did many of these, so that's why these ones are Portland, Oregon (where I eventually want to be)
You can paint just the heart or just the border:
Or you can paint the entire thing!
Step 8
Hang up!!
You hang that art piece and you feel a swell of pride as you do. It is extremely necessary that you step back and admire it.
Good job, you, Ya did good.
Craft on, little birdies


No comments:
Post a Comment